Installing Policy Server
Deployment Type
The Policy Server can be installed in two ways depending on the scale or management method.
On-premises
A system that manages customer policies and networks by directly installing a physical Policy Server on the internal network.
Cloud managed
A system that installs a virtual Policy Server in a cloud environment. Administrators access the cloud system to manage policies and networks.
Hardware Preparation
You can install the Policy Server on a physical system or a virtual system.
Physical Appliance
For testing and small-scale deployments, you can use general Intel servers such as HP, Dell, or Mini PCs.
Minimum Hardware Requirements
- Processor : Intel or AMD Dual Core
- Memory : 4GB (8GB recommended)
- Storage : 120GB
- NIC : Wired network interface, wireless interface (optional)
Note
Hardware requirements may vary depending on the number of managed nodes.
Virtual Machine
You can install the Policy Server on a virtual system. NAC supports various hypervisors such as VMWare, VirtualBox, and XenServer.
Cloud managed
Genians provides a cloud management service that eliminates the need for users to manually install and manage the Policy Server.
Network Connection Preparation
Genian NAC requires a network connection with at least one static IP address. If installing with an On-premises configuration, that interface can be used as the management interface.
Genian NAC connects to the network's broadcast domain to monitor all broadcast packets.
If the network you wish to manage is connected via WAN, a physically separate Network Sensor is additionally required.
Note
Software Download
Download the Policy Server ISO file through the Technical Support Center and create a bootable USB for physical appliance installation.
Note
Policy Server Installation
Boot the Device
- Connect the bootable USB to the computer.
- Change the boot order in BIOS settings to boot from USB first.
- For virtual machines, select the ISO file of the installation media. (If it is a virtual machine)
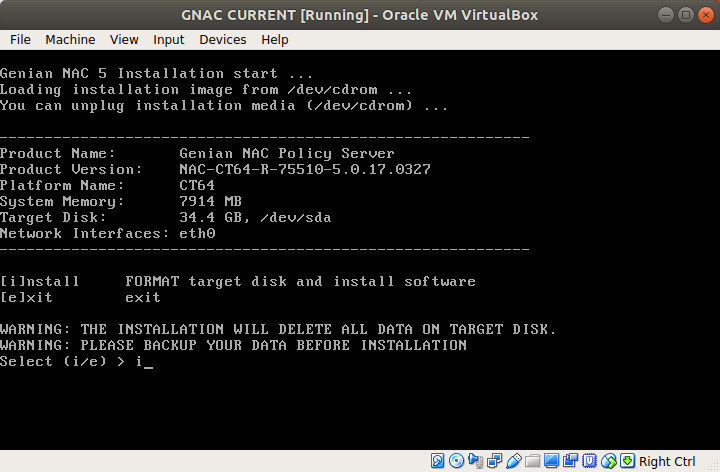
If installing the product on your own hardware or a virtual machine (not a Genians-provided Appliance), enter "UNKNOWN-CT64" for type Model Name.
- Enter "i", and if there is an existing system, enter "y" to delete and proceed.
- Once installation is complete, remove the media. (USB or ISO file)
Initial Configuration
After the system reboots, you must perform initial settings.
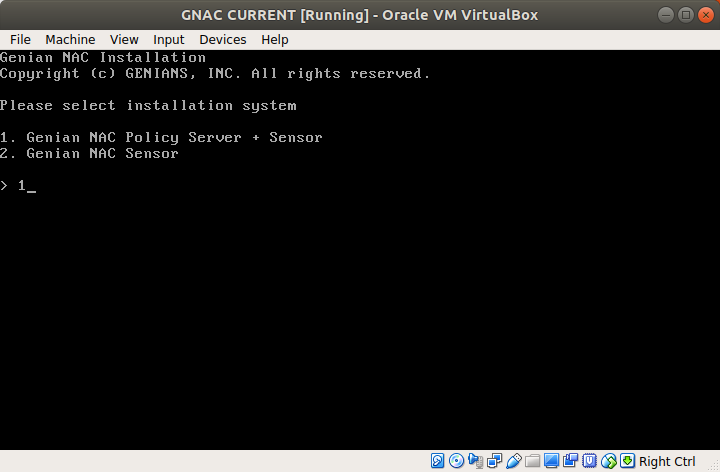
Select Initial Configuration Method (Enter "1")
- Interactive Wizard : This method uses a wizard for configuration.
- Manual Configuration : This method uses manual CLI commands for configuration.
Select Policy Server Operating Type (Enter "1")
- Single Server - Stand Alone : Operates as a single server.
- Multi Server - Backend (Log/Database Server) : Log and DB (Backend) are separated.
- Multi Server - Frontend (Node/Mgmt Server) : Node and Management (Frontend) are separated.
Select Language (Enter "2")
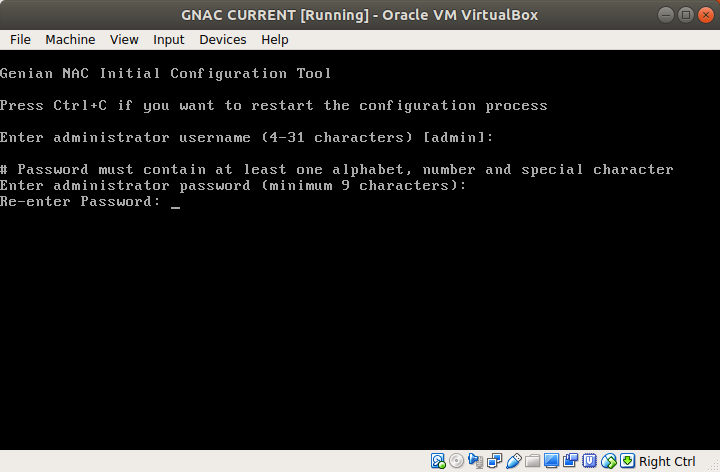
Create an Administrator account for Web UI and SSH connection
- Enter the administrator account name.
- Enter the administrator account password.
NTP Server Configuration
- Enter the NTP server IP or FQDN (default is pool.ntp.org).
Select Connection Type
Note
If interface eth0 is connected: Access Port (general port)
- Enter "n"
If interface eth0 is connected to a 802.1Q Trunk Port:
- Enter "y"
- Enter the VLAN ID for NAC service activation. (Comma-separated or connected by AB for range, e.g., 10,20-30)
- Enter the VLAN ID for interface management.
- VLAN Sensor interfaces are set as DHCP clients by default.
- To define a static IP for VLAN interfaces after initial installation, change the interface IP address. Refer to: Configuring Interface IP Addresses
- Sensor interfaces must be configured for each VLAN after initial installation. Refer to: Adding And Deleting Network Sensors
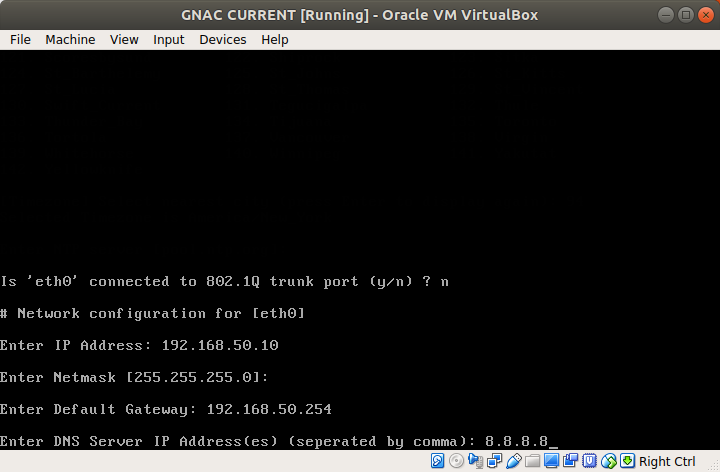
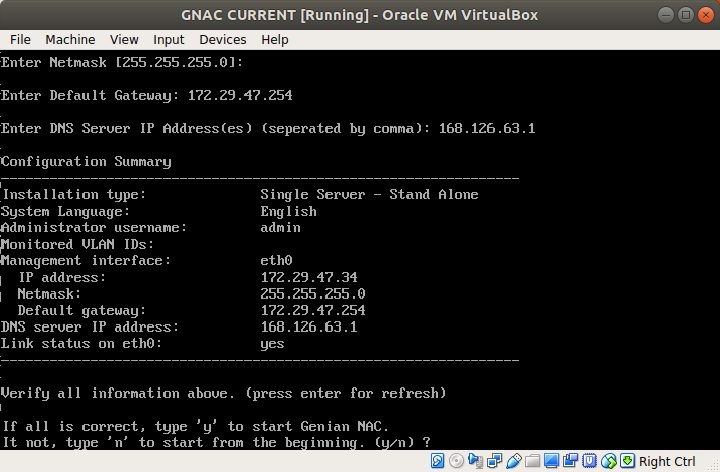
Network Configuration
This step is to set the interface IP address for management.
- Enter IP address
- Enter Netmask
- Enter Default Gateway
- Enter DNS IP address (comma-separated)
Policy Server Connection Information (only for Network Sensor)
This step is to set up information for connecting to the Policy Server.
Enter Policy Server Address
Enter Sensor Token
- If Policy Server > Settings > Preferences > Node Management > Sensor Token > Use Installation Token is ON, enter the token. Refer to: Configuring Policy Server Connection with Token

Confirm All Information
- If everything is correct. Enter "y" and start
- If not correct. Enter "n" and reset
- Log in to Genian NAC Management UI. Refer to: Administrator Console
Unsupported Hardware
If installation on your own hardware does not proceed normally, please contact your designated partner engineer or Technical Support Center.
Note
When installing in a virtual environment, if the storage device or network interface is not recognized, change the storage type to SATA or change the network interface driver to an Intel family like E1000.