Installing Genian NAC
Note
All installation methods require a Genian NAC iso image. This image contains both the Policy Server and Network Sensor.
Choose Policy Server Deployment
Cloud-managed
A Genians Cloud deployment option is available that does not require users to manually install and manage Policy Servers. Additionally, a Private Cloud option is available through an AWS Marketplace AMI. A Network Sensor appliance is still required on your network in order to access most features of Genian NAC. Continue reading for network sensor installation instructions.
On-Premise
In an On-Premise deployment, both the Policy Server and Network Sensor(s) are both installed on the users physical or virtual appliances.
Choose Appliance Installation Type
All-in-One (Policy Server + Network Sensor)
This option is for On-Premise deployments only. In a small network, a system can function as a policy server and network sensor. Sensor may be disabled if only Policy Server is desired (see next section).
Note
Standalone Policy Server
Complete the same steps as shown in All-in-One configuration. After installation, disable the network sensor component.
- Go to System in the top panel
- Select the Policy Server IP Address
- Click the Sensor tab
- Find the Interface of the sensor, and select Sensor under Settings.
- For Sensor Mode, select Inactive
- Click Update
Network Sensor Only
Physical Machine
You can use generic intel server like HP, Dell or Mini PC for testing and small deployment. If you have any hardware comparability issue, please contact us
Minimum Hardware Requirements
- Processor: Intel or AMD Dual core
- Memory: 4GB (8GB Recommended)
- Storage: 120GB
- NIC: 1+ Wired Network Interface, Wireless Interface (Optional)
Virtual Machine
You can install Policy Server on virtual machine. We support various hypervisors like VMWare, VirtualBox, XenServer.
Configure the Virtual Machine to Run as System Type: Linux, Version: Other 64-Bit.
Note
If installing to a Virtual Machine:
- you must enable Promiscuous mode.
- Network Sensors installed onto a virtual machine typically will not have direct access to the wireless interface on the host hardware. As a result, a wireless sensor will not be detected, even if the host machine uses a wireless network interface.Genian NAC will detect the hosts wireless interface as a wired sensor interface. In this case, an endpoint agent installed to a device with a wireless NIC can perform the functions of a wireless sensor. See: Controlling WLAN
- You must set your adapter to Bridge Mode if connecting to an access port, or enable VGT mode (or equivalent settings) if connecting to a trunk port. For more info see the page below:
For more information about hardware requirements, See Sizing Software and Hardware.
Prepare Network Connection
Genian NAC requires a network connection with at least one static IP address for management. If you are installing in an All-in-One configuration, you can use the management interface with an interface for network sensors.
Genian NAC needs to monitor network broadcast packets (ARP, DHCP, uPNP...), it must be connected to all the segments (broadcast domains) that you want to manage.
If you have a switch configured with VLANs, you can set up an 802.1Q trunk port to monitor multiple networks with one physical interface.
If you are installing Genian NAC in a virtual environment, the VM (Sensor) must have direct communication to and from all segments you wish to monitor and control. This may be accomplished in a variety of ways depending on your available hardware, and the capabilities of your virtualization platform.
Access Port
No additional configuration is required to monitor a single network over a switch access port. If you are installing to a machine with more than one NIC, you can still monitor multiple LANs, or VLANs through access ports.
Trunk Port
To monitor multiple VLANs on a single interface, your switch port must be set to trunk mode with 802.1Q encapsulation. Below are examples of how to configure 802.1Q Trunk ports for VLANs on common switches. In these examples, we will show how to add VLANs 100 and 200 to port 48, configured with .1q trunk encapsulation.
Cisco Switch
Cisco(config)#interface gi1/0/48
Cisco(config-if)#switchport trunk encapsulation dot1q
Cisco(config-if)#switchport mode trunk
Cisco(config-if)#switchport trunk allowed vlan add 100,200
HP Switch
Procurve(config)#vlan 100
Procurve(config)#tagged 48
Procurve(config)#vlan 200
Procurve(config)#tagged 48
Download Software
Download the Policy Server ISO file from the Technical Support Center and create a CD-ROM or bootable USB for physical machine installation
Note
The Genian NAC installation contains the linux operating system. You do not need to install a separate OS.
Installing Genian NAC
Follow these steps to install a Policy Server, Sensor, or combined system on a device.
Boot up your machine
- Insert the CD-ROM or bootable USB flash drive into your physical machine
- Change the boot sequence to boot from the CD-ROM or USB drive
- On virtual machine, select ISO file for installation media.
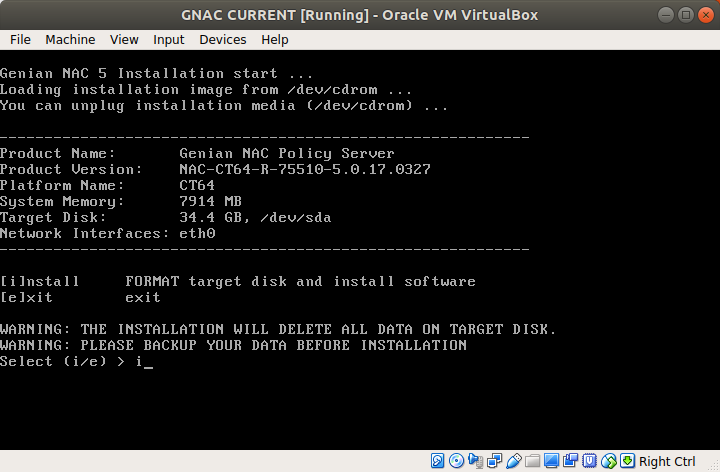
Type “1” for Genian NAC Policy Server + Sensor (or type "2" for install additional network sensor)

Warning
This will erase all files on the target disk. Data lost will not be recoverable.
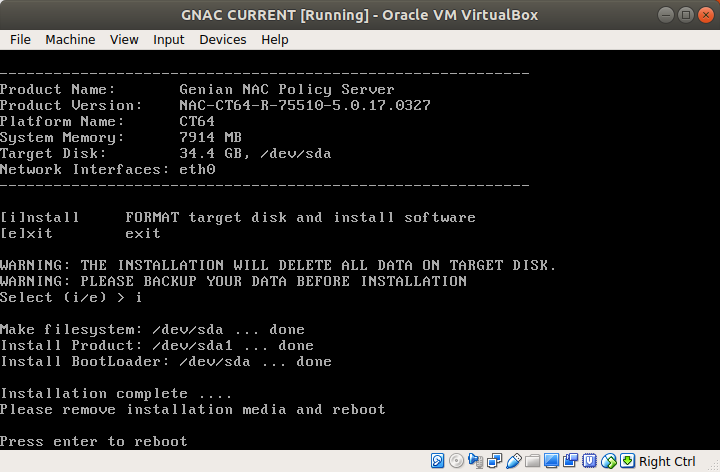
- Type “i” to proceed
- Reboot your system
- Remove the installation media (e.g. USB)
- Press Enter to reboot
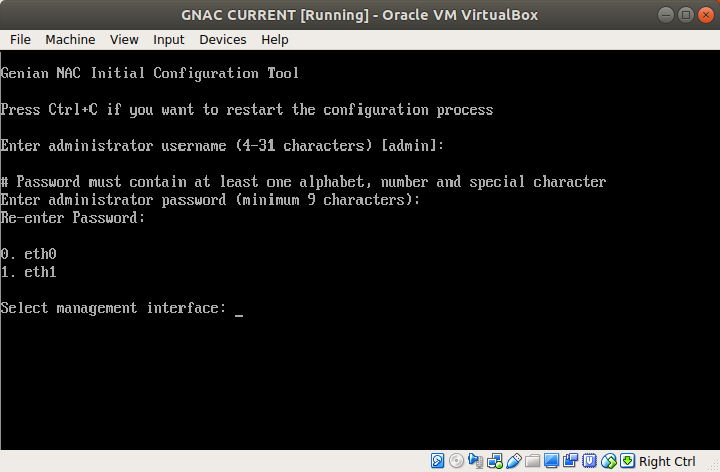
Initial Configuration
After the system reboots, you need to do the initial setup.
- Create admin account for Web UI and SSH connection
- Enter superadmin account name. (default is admin)
- Enter superadmin password

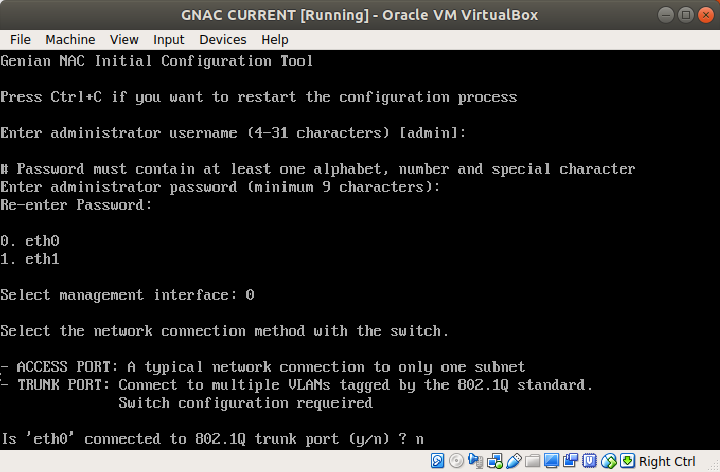
Select interface & connection type
Note
Please make sure that the network connection is connected to the first interface (eth0) of the system.
- In case the interface eth0 is connected access port (regular port)
- Type "n"
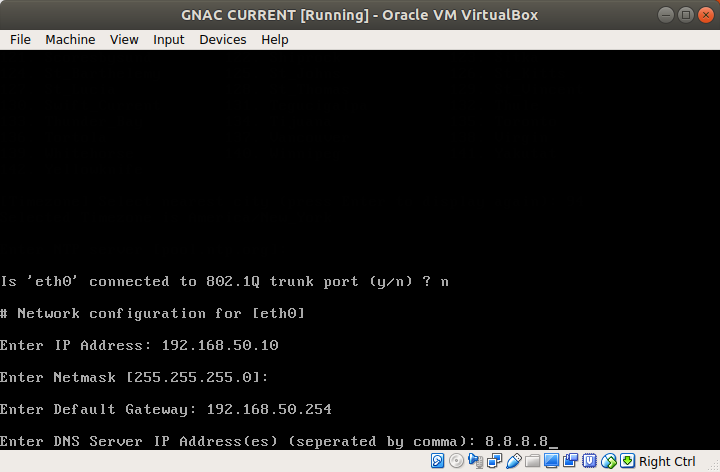
- In case the interface eth0 is connected to 802.1Q trunk port
- Type "y"
- Enter VLAN IDs for activate NAC service (Concatenated by comma or A-B for range. e.g: 10,20-30)
- Enter VLAN ID for management interface
- Select Y / N to set VLAN Sensor interfaces as DHCP Clients.
- To define static IP's for VLAN interfaces after the initial installation, see: Configuring Interface IP Addresses.
- Network configuration
This step is to set the interface IP address for management.
- Enter IP address
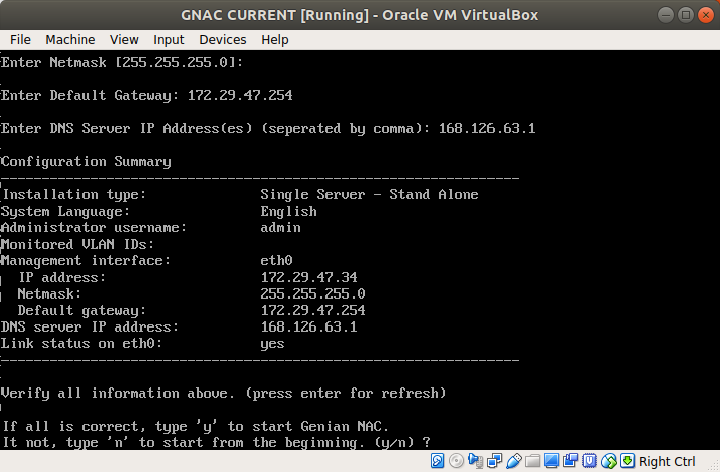
- Enter netmask
- Enter default gateway
- Enter DNS IP addresses (Concatenated by comma)
- Enter Policy Server IP or FQDN.
Note
This step appears only if you selected Network Sensor during ISO installation step 2.
- IP Address (e.g. 192.168.50.10)
- Cloud Site Name (e.g. sitename.genians.net)
- Verify all information
- Everythings correct. Type “y” to start
- Something wrong. Type "n" to restart configuration
- Login to Genian NAC management UI on the Policy Server. See Administrator Console
Important
Review Firewall Requirements in Preparing Network to ensure that communications between the Policy Server and Sensors/Agents is allowed.
Unsupported Hardware
If you find any device driver unsupported problems. please report to us.
Note
If the storage device or network interface is not recognized when installing the virtual machine, please change the storage type to SATA or change the network interface driver to Intel series such as E1000.